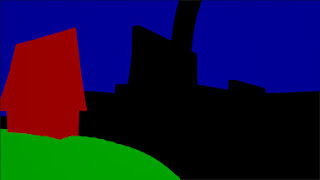
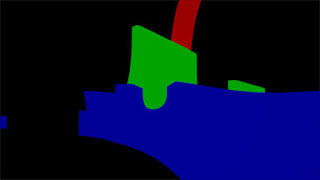
1.Set up a new render layer in Maya where the objects in the scene are present (no need for lights) and set up 4 surface shaders.
One for each color (diffuse is fully red, fully blue or fully green) and black (which will be used as blank). First assign the black to everything in the layer.
2.Assign colors to the objects you want to separate out... Up to 3 regions per render corresponding to each color.
NOTE: you'd have to give the material displacement if needed
(this is in the shader group of the surface shader, not the material itself. See the node by viewing the in-and-out connections in the hypershade, then connect the file node of the displacement map into the displacement channel.)
3.If you have more than 3 areas you want to separate out to do individual adjustments, make another render layer and assign the red blue green shaders accordingly.
NOTE that if, for example, your red shader was used on an object with displacement, you'll have to make a new red if you want another object in another layer to not carry over that displacement.
4.RENDER it out


Note that I made 2 render layers because I had more than 3 separate objects I wished to control in post.
After Effects:
-Note that this does not have to be only for the Beauty Pass-
1. Take your beauty pass and your desired rgbmatte pass and put them into the same sequence. The matte layer should be underneath and therefore, hidden behind .
2. With the beauty pass selected, go to Effects -> Channel -> Set Matte
The new effect should let you choose to use the rgbmatte pass, and also the color channel you want to turn into a 'clipping' mask like in Photoshop. (choose the red channel, for example, and for this beauty pass layer, only the object that has the pure red in the rgbmatte pass will be visible)
3. Now you can adjust only one object's levels/saturation/colors etc without affecting the rest of the image
4. Make a copy of the beauty pass as another layer and do another Matte if needed. Keep going until you have the control that you want.

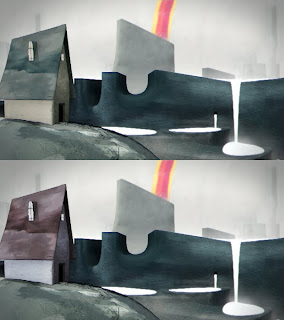
In this example, I used the red channel of the first matte pass to isolate the house and then perform some hue shifting to it.
No comments:
Post a Comment